OpenEVSE Goes Live
I’ve spent the last few weeks pondering, then ordering and finally building and installing an OpenEVSE.

In Australia the Model 3 comes with a Mobile Connector and a High Powered Wall Connector. These are fairly straight forward devices that connect your car to the grid in such a way as to prevent the car drawing too much power and causing a fire or tripping a breaker. Collectively devices that connect your car to the grid are called EVSEs - Electric Vehicle Supply Equipment.
One important point to understand is that the electronics that convert AC grid power into DC to charge the car - the charger - is built into the car. They vary in capacity from car to car however the one built into the Australian Model 3 is capable of 7.4kW (~50km/h) on single-phase and 11kW (~75km/h) on three-phase power.
My house is only wired up for single-phase so I’ll be limited to 7.4kW. This is enough to fully charge the car from empty in about 10 hours which is great - I doubt I’ll ever need to use a SuperCharger near Brisbane when I can charge this quickly at home.
So why, good sir, do you need to buy another thing?
Because this is just a little bit smarter - and smart things are cool. I have recently installed solar panels on my house - 6.6kW of panels attached to a 5kW inverter. Having solar is great but it only works for a few hours a day when the sun is shining - the rest of the time you are drawing from the grid. And when the sun is shining my system is pumping out ~4-5kW of power which is much more than my house consumes in the middle of a typical day. Even if I set my pool pump and washing machine to run only during peak production hours I’m only self-consuming about 4kWh of the 20 or more kWh my panels produce each day.
It would be pretty great if I could take those other 16 kW and pump them into my car, right? That is where the OpenEVSE comes in. It integrates with my EmonCMS energy monitor to track when the solar system is producing more than my house is consuming (a.k.a feed-in) and tells my car to start charging at a rate that matches this excess production.
Beyond the warm-and-fuzzies of getting to drive my car on the photons collected from my own roof there is also an economic benefit. In Brisbane we typically pay about 25c/kWh for electricity drawn from the grid however we only get paid 15c/kWh for power we feed back into the grid. This means for every kWh I self-consume I’m saving 10c. Eventually, after a year or so, those 10c add up to enough to pay for an OpenEVSE.
How does it work?

As you can see in the graph, the blue line is the excess energy that I’m feeding back into the grid. The result is a bit abstract as I don’t actually have the car yet so we don’t see the actual power draw, but we do see in yellow the ‘pilot’ output, which is the amount of power the OpenEVSE would be telling the car to draw.
The standards around EVSEs limit the minimum the car can draw to 1.4kW so you see this as the base of the yellow line. I need to do a bit of programming to have the car start charging once the feed-in is over 1.4kW and have it turn off again once it’s been below 1.0kW for 15 minutes. This delay will prevent the EVSE from flickering on and of on cloudy days.
Building it
The OpenEVSE is available in several different forms, including:
A tethered kit from the US or UK, as I assembled
A pre-built unit with a tethered cable from the US
A pre-built unit or kit with a socket from the UK
In my case I ordered the kit from the UK and purchased the tethered 5 pin, single-phase cable itself separately from AliExpress. This worked out cheaper than buying the cable from either the UK or US shops.
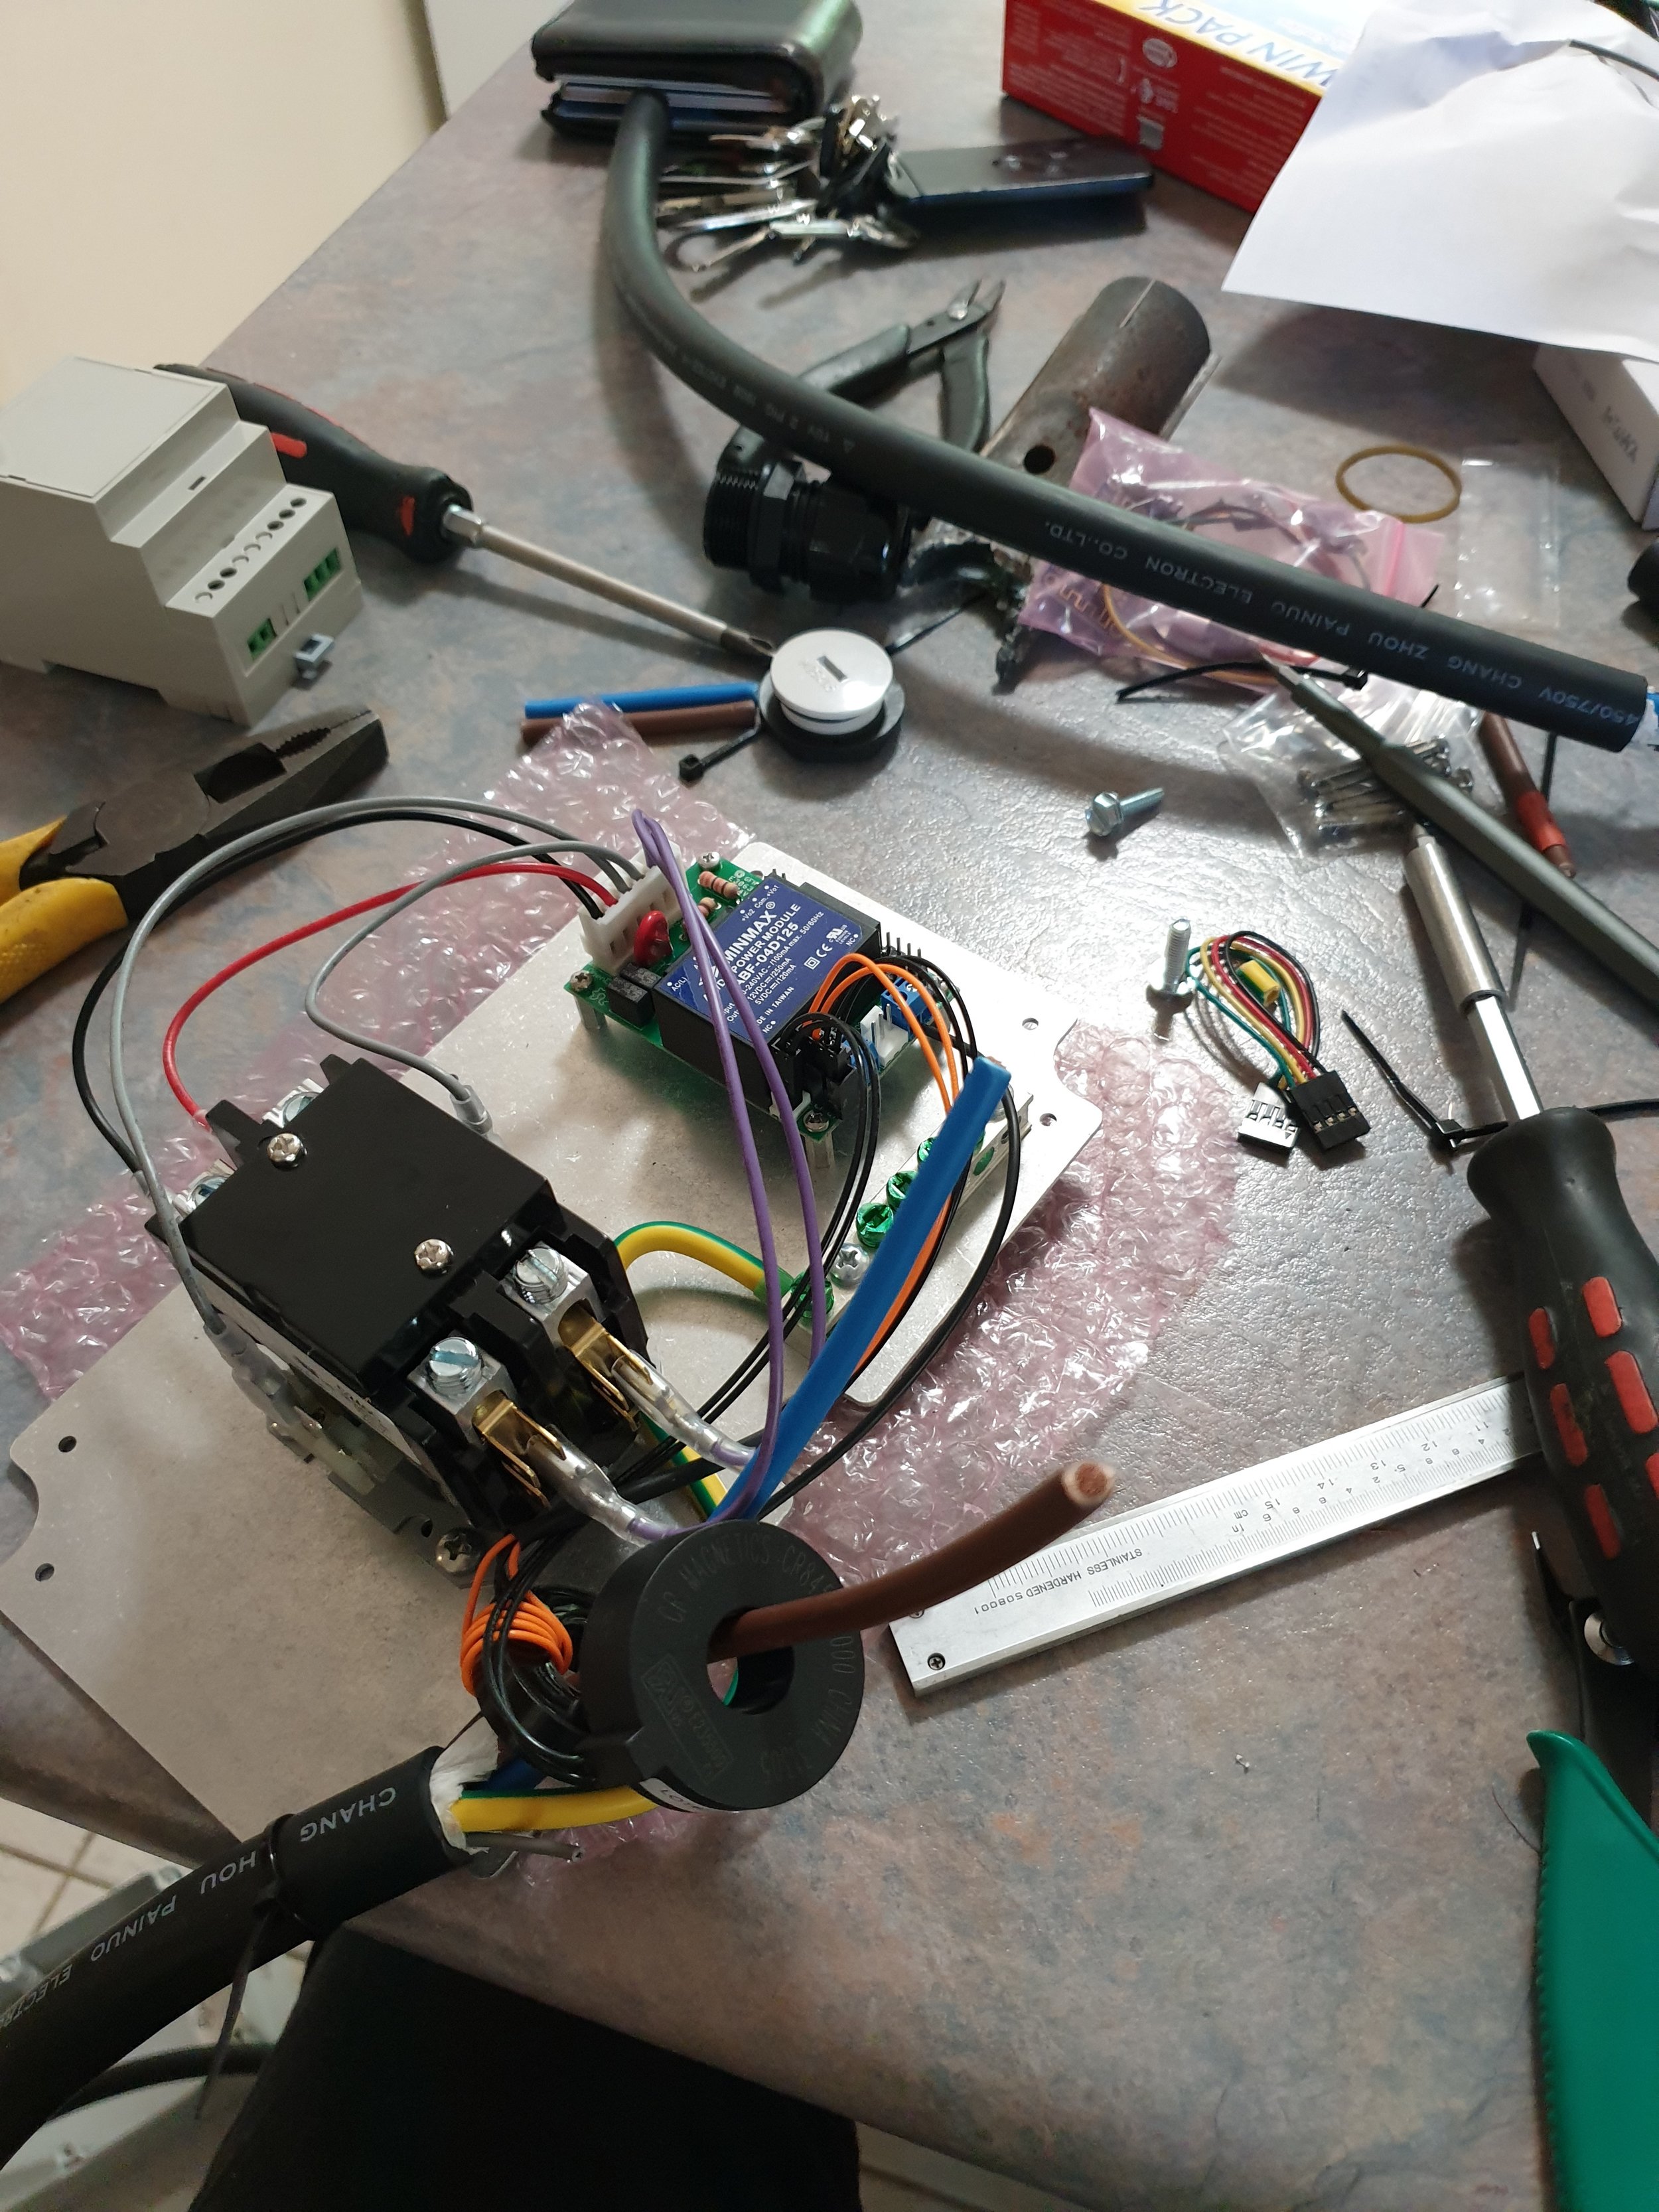
The kit comes ready to assemble - no soldering required. You’ll only need some cutters and a few different screwdrivers to put it together. The only extra that I needed to buy was some 6mm boot laces to properly terminate the flexible cable into the screw terminals both in the EVSE and the isolator my electrician installed. I cut about 50cm of cable off the AliExpress to make the cable from the isolator to the OpenEVSE. Overall the assembly, mounting and network configuration took about 2.5 hours.
There are plenty of details on the assembly on https://www.openevse.com however my one criticism is that the instructions jump between the various versions of the device that are available. There are also a bunch of assembly videos on YouTube.
So, do you recommend it?
For normal people - no. It requires skills that most people don’t have. But thankfully there is a great alternative that doesn’t need any electrical or software engineering skills - the mienergy zappi. It’s a bit more expensive at $1200 AUD but should still pay for itself within 3-4 years.
The zappi is not quite as flexible but has better features out-of-the-box as compared to the OpenEVSE. The OpenEVSE does come with Wi-Fi and integration with EmonCMS - the zappi doesn’t have any connectivity as it is though I understand there is now an additional hub that will connect it to the mienergi portal and a mobile app.
In all though, for me, the OpenEVSE is a great toy with some real financial payback and I look forward to connecting it to my Model 3 and seeing the statistics that come out of it over time.